Tuesday, October 26, 2010

DIY Christmas Cards

I really love Christmas and one of my favorite things to do is design Christmas cards. Actually I like to design all kinds of cards, birth announcements, invitations, etc. It's a lot of fun. I use shabby princess digital scrapbook papers and embellishments to make them and I'm going to show you how to do that too. All you need is a photo editing program like CS5 or elements and a connection to the internet so you can download your goodies.

Step one:

Visit shabby princess and choose and download your paper which will be the back ground of your Christmas card. Don't worry about the color of the paper, that can be changed later. For this example I'm using Urban Kiwi.

Step two:

In your photo editing program of choice (I'll be using CS5) open up your background paper and then crop it down to the desired size; I'm using 4x5 about the size of a post card. Then turn it black and white.

Step three:
Select the entire 4x5 image using the rectangular marque tool, then right click and select new layer, then right click again and select fill, then white (or color if you'd like a different color). Say Ok, it should turn the image white.


Step four:
Now, select the layer titled "layer 1" and move the opacity down to 65%. Then right click any layer and select flatten image.
OK, now we have our background ready, it's time to embellish it!

Open up any image you'd like to use, then click image, image size (at the top left of the screen). Then reduce it to about 1000 pixels wide, say OK.

Now, set it so you're able to see both images. On the photo you've decided to use click the background layer, then drag it to the card background. Then use "control t" to drag it around, make it smaller, etc.

Alright, we need some color in here, I'm thinking red.

Using your rectangular marque tool make a box, select new layer, then fill, then color and choose whatever color you want. Say OK.
Now you can fill that box with whatever text you want, for inspiration I peruse stationary website like this one.

The key to getting it to look like this is using multiple text boxes and using your opacity bar. It still looks a little plain though. We need more embellishments which is where using brushes comes in handy. deviantart.com is great for finding embellishments. All you do is type Christmas brushes into the search box at the top, then download whichever brushes you want and save them in a folder on your desktop. Here is a screen shot to help you with loading your downloaded brushes:

I decided to use a snowflake brush and here is the end product:

Once you have your finished product head over to shutterfly or kodak.com (or whcc if you've got it) and print out however many you need. I think this is a great alternative to ordering them online and spending $30 for a pack of 30. With my printing company, WHCC, I can get 30 for under $8. But I don't need 30, I need 10 which makes this even better because I won't be stuck with 20 extra cards that I paid for but won't be using.

So there you have it, a thrifty and unique spin on the tradition of giving out Christmas cards! I just want to remind everyone that shabby princess papers are for personal use only, not for resale.

RAW vs. JPEG


Here is an embarrassing fact, I have never, until this day, shot in RAW. OK, fellow photographers, go ahead and laugh or gasp in horror but the truth is that until this day I really didn't grasp the huge difference in quality between the two and shooting in RAW just sounds so complicated. Like the egg roll wrappers, it scared me. I need to really get over these unreasonable fears.

Now, the above comparison shows two images, 1 edited in camera raw 6.0, the other edited in photoshop CS5. I edited the RAW file first and then tried my best to mimic the finished product with the JPEG copy of the image. As you can see there is a huge difference!! The RAW file is more detailed, and for lack of a better term, you can differentiate between the colors better. Look at the tag for example, in the jpeg the tag is dark blue but in the RAW file you can spot a few different blues.

In addition to overall appearance RAW is super easy to edit, it takes 30 seconds max per image and you're done. Not to mention you've got a heck of a lot more freedom with editing. It's pretty much amazing. Also, depending on your camera you may be able to take both a raw and jpeg file simultaneously, meaning for every raw photo you take you have a jpeg copy of it.

So for all of you photographers out there who are afraid of RAW, don't be. Go ahead and give it a try, but maybe bring an extra memory card with you on your first RAW photo shoot because the files are large, especially if you're taking jpeg copies, that card will fill up fast!

Monday, October 25, 2010

A Little Update on Alice

She's got two teeth now


And she recently discovered her tongue's ability to stick out.


And she makes really weird faces sometimes


And she likes to sing along when I sing to her. I assume she's doing her best to mimic me which in turn makes me feel better about my decision not to pursue a singing career.

And she can walk... while sticking her tongue out of course


And lastly, she found out that curtains can be a lot of fun to play with.


Sunday, October 24, 2010

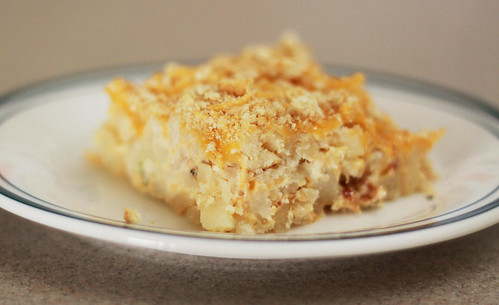
Healthy Comfort Food - Hashbrown Casserole

IMG_5346


One of my absolute favorite recipes of all time is this hashbrown casserole which just so happens to combine several of my favorite things, bacon, cheese, and potatoes. Yes, it's technically breakfast but we eat it for dinner over here.

You will need:

6 slices center cut bacon
2/3 of a package of frozen hashbrowns

1/4 cup white onion - diced
4oz fat free cream cheese
1/4 cup light sour cream
1/4 fat free chicken broth
1/4 green onion

1 tsp garlic powder
1/2 tsp paprika
salt and pepper
1 cup 2% cheddar cheese - shredded
5 whole wheat ritz crackers
 
Preheat oven to 400.

In a skilllet cook bacon. Drain grease from pan and cook potatoes and onion on medium high heat until heated through.

Meanwhile mix the next 8 ingredients with crumbled bacon, reserving 1/2 of the cheddar cheese. Mix with potatoes and onions and spread into a greased baking dish. Top with remaing cheese and crushed crackers. Bake until cheese is bubbly.

Makes 6 servings at about 300 calories each.

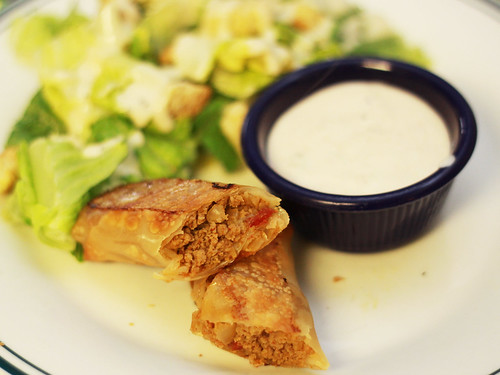
A Restaurant Favorite: Southwest Egg Rolls, Healthified

IMG_5310

I debated over whether or not to share this recipe with you all because there is just so much more I could have done with it, like the additions of corn, black beans, and jalapeno but as you have seen in a few of my previous posts, certain foods scare me. Egg roll wrappers are one of those foods but I have now conquered that fear and I will be incorporating those things into this recipe next time. I should clarify here, I'm not scared of the food itself I'm afraid of failing at preparing said food. Because of that I tread lightly, I don't push it with my fancy black bean, corn, and jalapeno dreams. That said, these were still pretty good, so good that there were no left overs and hey, at 70 calories per roll I don't feel the slightest bit bad about that.


You will need:
egg roll wrappers
packet of taco seasoning
1 lbs ground turkey
1/4 cup onion
1/4 diced roasted red pepper
water for sealing edges
Salt and crushed red pepper

Preheat oven to 425.

Cook turkey, onion, peppers, and season them according to the directions on the taco seasoning packet, salt, and crushed red pepper. Remove from heat and let it cool for about 10 minutes.

Then place egg roll wrapper down in front of you so it's in the shape of a diamond. Place 2 tbs of turkey mixture in the center then fold the bottom over then the sides, then dab a bit of water along the edges of the top of the wrapper and fold that over. Confused? It's OK, there should be a handy diagram on your egg roll package, if not, YouTube it!

Bake them for about 8 or 9 minutes, flip them and bake for another 8 or 9 minutes.

But wait, there's more! These would be nothing without their wonderful dipping sauce.

Mix the following together
1/4 cup sour cream
1 tbs ranch dressing
1/2 tsp salt
pinch of cumin
1/2 tsp garlic powder
1/2 tsp paprika
and any other Mexican spices you'd like

That's it, easy and healthy!

Wednesday, October 20, 2010

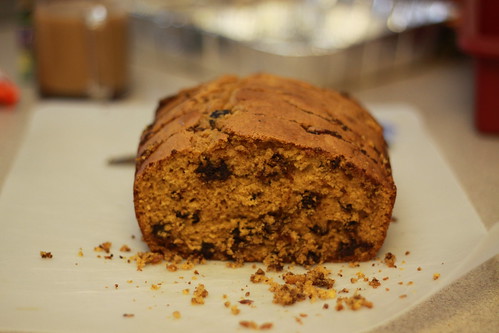
Pumpkin Chocolate Chip Pound Cake

IMG_5238

This was my first cake with the Cake Slice Bakers and it was amazing! Let me say that when I joined the cake slice bakers I thought it was a cool concept, a group of bloggers baking cakes together. But I didn't quite understand the purpose, I mean there are no prizes for best cake or anything. Still I thought it sounded fun so I went ahead and did it. Now I see that the goal (for me at least) is to get me out of my comfort zone. I probably wouldn't have ever made this, I'm not a huge pumpkin person and the ingredient list seemed a little long however most of it was stuff I had on hand at home. I am so glad I did end up making it though, it was exceptional. It's a very moist, dense, melt in your mouth kind of cake. I ended up selling most of the slices at a bake sale.


Makes one 9 by 5 inch loaf cake


October’s Cake: Pumpkin Chocolate Chip Pound Cake

(Recipe from Cake Keeper Cakes by Lauren Chattman)

Ingredients

1¾ cups all purpose flour

1 tsp baking soda

1 tsp baking powder

1 tsp ground cinnamon

½ tsp salt

¼ tsp ground cloves

Pinch nutmeg

½ cup (1 stick) unsalted butter, softened

1¼ cups sugar

3 eggs

1 cup canned pumpkin puree

1 tsp vanilla extract

1/3 cup milk

1 cup semisweet chocolate chips

1 cup chopped walnuts


Method

Heat the oven to 350F. Coat the inside of a 9 x 5 inch loaf pan with nonstick cooking spray and dust with flour.

Combine the flour, baking powder, baking soda, cinnamon, salt, cloves and nutmeg in a medium mixing bowl.

Combine the butter and sugar in a large mixing bowl and cream with an electric mixer on medium high speed until fluffy, about 3 minutes, scraping down the sides of the bowl once or twice as necessary.

With the mixer on medium low speed, add the eggs, one at a time, scraping down the sides of the bowl after each addition. Stir in the pumpkin puree and vanilla. Stir in the milk.

Turn the mixer to low speed and add the flour mixture, ½ cup at a time, scraping down the sides of the bowl after each addition. Stir in the chocolate chips and walnuts.

Scrape the batter into the prepared pan and smooth the top with a rubber spatula. Bake the cake until it is firm to the touch and a toothpick inserted in the centre comes out clean, 55 minutes to 1 hour. Let the cake cool in the pan for 5 minutes, invert it onto a wire rack and then turn it right side up on a rack to cool completely.

Store uneaten cake in a cake keeper at room temperature for up to 3 days or in the refrigerator, wrapped in plastic for up to 1 week.


Monday, October 18, 2010

Monster Toe Bread Sticks

monster toes 2
We recently decided to have a weekly themed dinner and a movie night where we pick a movie and then cook accordingly. This last week we chose Hocus Pocus and I made my zuppa toscana soup (we just called the sausage witches warts) and monster toe bread sticks followed by some candy corn cereal treats. Unfortunately netflix messed things up and sent us The Last Song, the Miley Cyrus flick about a girl whose dad dies from cancer, it didn't exactly fit the bill so we all settled for an episode of Heroes instead.

These monster toes are unbelievably easy and fun to make, kids can help too.

Ingredients:
1 package of pillsbury seamless dough
a handful of sliced almonds for the finger nails

Open the dough and form it into a ball. Then tear off chunks and form them into toes, the uglier the better. place an almond on the end of each toe and gently press it into the dough so it sticks.

Bake them according to the temperature on the package until they're golden brown, about 15 minutes.

monster toes 2

Next week is Disney's Oceans, so stay tuned for that!

Sunday, October 17, 2010

When in Doubt, Dip it in Chocolate

Last night  Nick and I finished a romantic dinner of reduced fat hot dogs with chocolate dipped strawberries, bananas, and.... deep fried cheesecake and peanut butter balls. We used a store bought chocolate dipping thing which was basically chocolate candy melts, you can find it in your grocery store's baking aisle next to the chocolate chips. We used the dark chocolate option but use whatever you'd like, I imagine white chocolate would be good too.

Fried Cheesecake Dumplings:

3 egg roll wrappers
3 tbs reduced fat cream cheese
1/2 tbs sugar
1/2 tsp vanilla
Oil for frying

Heat oil in a deep fryer. Meanwhile mix cream cheese, sugar, and vanilla.

Cut egg roll wrappers in half twice, making 4 squares. Take about 1/2 tsp of the cream cheese mixture and place it in the center of an egg roll wrapper. Dip your finger in water and trace the edge of the wrapper, this will help seal the wrapper. Fold the wrapper in half so it makes a triangle, then press the edges together tightly. Be careful and make sure that you don't puncture the wrapper because if any of the cream cheese mixture should escape into the oil it will bubble violently and may cause a fire if you're doing this on the stove top. This is why I recommend using a deep fryer, where there isn't an open flame. Drop dumpling into the hot oil and cook until golden brown, you may need to flip it once so it cooks evenly. Remove dumpling from oil and let the excess oil drain onto a paper towel lined plate.

Once dumplings have cooled dip them in chocolate and refrigerate for 15 minutes. Feel free to substitute the cheesecake mixture with peanut butter.

These were so good! I would recommend dipping some in chocolate and leaving some without because I felt that the sweetness of the chocolate over powered the tartness of the cream cheese. Enjoy!

Thursday, October 14, 2010

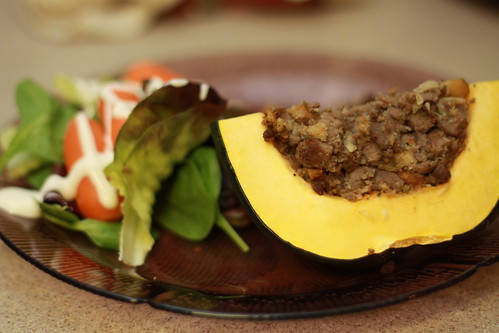
They Can't All be Perfect

IMG_5235

Not all recipes I make are good and usually I just spare all of you from seeing them but this one had such potential to be great so I'm sharing it with you in hopes that someone out there will see a solution to my problem here.

The recipe: Acorn Squash. It's one if Nick's childhood favorites that his mom used to make. That alone destines me for disaster because no matter what I do it will never be quite how my mother in law made it. So I figured that I would switch things up a bit and revamp the recipe. The original recipe calls for sausage and acorn squash. That's it, you roll the sausage into a ball, stuff it in the squash, and bake it. I have a mild allergy to simple therefore I do my best to complicate things. Some people, *cough* Nick,  find that little fact about me just a little bothersome. Anyway, this time I cooked the turkey sausage first, threw in some diced apples, seasoned it with poultry seasoning, cinnamon, nutmeg, salt and pepper, and about 1/2 cup stuffing mix and then stuffed it into the squash and cooked it for 30 minutes at 375.

The filling was amazing if you ask me, Haley, or Alice, the 3 of us devoured it. Nick was disgusted and almost upset about how I had taken this wonderful slice of his childhood and tweaked it to my liking. I mean, he wouldn't say it, but the man was visibly disappointed in me over food, I could tell.

The squash was inedible, 50% raw which meant it was nearly impossible to cut it and chewing it was tedious but it really couldn't have cooked any longer without the filling becoming over cooked.

Because the filling was so amazing I wanted to share it with you in hopes that you can do something with it, find something else to stuff it into, find some other way to eat it, and then tell me about it so my girls and I can one day be reunited with our sausage/apple/stuffing combo that we love so very much.

Monday, October 11, 2010

The Great American Bake Sale, Yo!

Please forgive me, lately I've had the incredible urge to end as many sentances as possible with "yo". It's like that song, "She's Gone Country", but she's gone gangsta.

So, about this bake sale. If you're a food network junkie you may have seen Sandra Lee of Duff from Ace from Ace of Cakes talking about it on TV. It's a very simple concept, people bake, they sell their baked goods, and then they donate the money to a program called share our strength. Share our strength then uses that money to help fund after school and summer programs that feed children in America.

Did you know that childhood hunger is an issue in America? I didn't. But it really is. For some kids the meals they receive in school are all they get, which means they may go hungry on weekends, over the summer, or on holiday breaks. 

After seeing this on TV I decided to start a team in 29 Palms called Team Semper Tasty. I've had the team for less than 24 hours and we've already got 4 members including me. But we need more! I would like to host a Great American Bake Sale monthly which means I need more volunteers.

We need the following: Bakers, Sellers, Publicists (people who can get the word out) , Decorators, and much more!

You can even bring your kiddos! I know Haley will be helping out, holding signs or selling the baked goods, it's a great learning experience.

To join Team Semper Tasty visit http://join.strength.org/goto/ and click "join team" sempertasty

Friday, October 8, 2010

The Joy of Baking/Cooking

My absolute favorite thing about cooking and baking is the happiness it brings to people. There are few things that you can give someone that will make their eyes light up and then make them shower you with praise. I love praise. So naturally I want to share my food with everyone I can. I often tell Nick that if I could just bake all day I would be the happiest girl on earth, I really would. And can you believe that last April I barely knew how to bake at all? I could cook, but baking was a rarity and usually meant pre-packaged cookie dough. My, how things have changed.

Anyway, I am incredibly excited because I will be baking lots of goodies for Nick's unit's bake sale! It's not for another week but I'm counting down the days and I'm trying to mentally organize all the ideas I have for what to make. I'm definitely making dark chocolate raspberry cupcakes witth scarlet and gold frosting, the USMC colors but I also want to make a pumpkin pound cake to slice and sell or maybe some bars, definitely something with a halloween look to it. Maybe I'll make candy corn cereal treats and 'glue' a candy corn to the tops with marshmallo fluff! Yes, this is going to be fun :)

Wednesday, October 6, 2010

Healthier Spider egg cupcakes

That sounds gross, spider egg cupcakes. But I assure you they were amazing, wonderfully chocolaty, and pretty dense (they even feel heavy in your hand). You technically could use your favorite box cake mix and just decorate the tops like I did but I urge you to try the recipe for these healthier chocolate cupcakes, the sour cream is amazing! Amazing I tell you! Plus, since I used egg beaters I didn't feel the slightest bit bad about licking the heck out of the spatula, bowl, and beaters!

Here is the recipe:

3/4 cup cocoa powder
3/4 cup all purpose flour
1/2 baking powder
1/4 tsp salt
3/4 cups of egg beater
1 cup sugar (or splenda if you want, I am personally banned from baking with artificial sweeteners, per Nick)
3/4 cup butter
1 tsp vanilla
1/2 cup lite sour cream
sugar pearls
white frosting
dark chocolate frosting
food coloring

Preheat your oven to 350 and prep 12 muffin cups with liners.

Then in a small bowl mix the first 4 ingredients. In a separate bowl cream butter and sugar with an electric mixer set on low. If you are creaming for the first time do not be afraid, it is perfectly normal for the butter and sugar to resemble a crumbly mess. Do not worry, persevere through the crumbles and you will be rewarded with creaminess.

Then, with your mixer on low add the egg beaters, 1/4 cup at a time. Then you need to slowly add half of the dry ingredients. Just add some, blend until moist, and then add a little more. After you've got half of it in there throw in the sour cream and mix it in well. Then slowly add the rest of your dry ingredients.

Fill cupcake wells 3/4 of the way full and bake for 25 minutes or until a toothpick inserted in the center comes out clean. Then walk away, and forget about them for a couple of hours, until they've cooled.

Frost your cupcakes with the dark chocolate frosting (I used store bought). Then blend some white frosting (about 1/4 cup) with food coloring to make orange. Place it into a pastry bag (or zip lock with the tip just barely cut off) and pip a dot onto the center, then pipe a circle around the dot, followed by a larger circle. It should look a little like this:
Then place the point of a toothpick on the center dot and lightly pull it to the edge of the cupcake. Repeat that a few times and you've got yourself a spider web. Then place a few pearls in the center for your spider eggs. Then eat one with your family and have a long internal debate over whether or not to keep the remaining 9 cupcakes for yourself or send them to work with your husband. Enjoy!

Tuesday, October 5, 2010

Apple and Raspberry Cup-pies


Just like cupcakes, but in pie form. These came to me in a dream, which is actually becoming more and more common these days. I dream about cooking and lately it's been apples because of our current apple abundance.I had my doubts about these so when I made them I didn't bother measuring ingredients but I'm going to do my best to remember about how much of everything I used.

What you need:
Pie Crust (home made or store bought)
1 apple
1 cup raspberries
2 tsp flour
1 tsp cinnamon
1/2 tbs dark brown sugar
2 tbs white sugar
Vanilla

Pre-heat oven to 425 and grease a muffin pan with 6 wells. Using either a round cookie cutter or a drinking glass cut 12 circles out of the pie crust. Place a circle of crust into the bottom of each well.

Peel and dice apple and mix it with flour, brown sugar, and cinnamon. Fill 3 of the muffin wells with the apple filling.

In a separate bowl combine the raspberries, white sugar, and about 1/2 tsp of vanilla. Fill the remaining three wells with this mixture.

Top each cup-pie with the remaining crust circles and bake them for about 20 minutes or until the crust is golden brown. Top them with a dollop of lite cool whip and enjoy!

Apple Coffee Cake

You'll be seeing a lot of apple recipes here for a while, that and raspberries since we picked so many. It turns out that $19 worth of apples is a ton of apples, who would have thunk it?

Adapted from Bisquick

Streusel Topping


2/3 cup Heart Healthy Bisquick® mix

2/3 cup packed brown sugar

1 teaspoon ground cinnamon

1/2 teaspoon ground nutmeg

1/4 cup cold butter or margarine


Coffee Cake

2 cups Heart Healthy Bisquick® mix

2/3 cup milk or water

3 tablespoons granulated sugar

1 egg

2 medium cooking apples, peeled and thinly sliced (2 cups)

1.Heat oven to 400°F. Spray 9-inch square pan with cooking spray. In smal bowl, mix 2/3 cup Bisquick mix, brown sugar, cinnamon and nutmeg. Cut in butter, using pastry blender (or pulling 2 knives through ingredients in opposite directions), until crumbly; set aside.


2.In medium bowl, stir together 2 cups Bisquick mix, 2/3 cup milk, the granulated sugar and egg; beat vigorously 30 seconds with spoon. Spread half of batter in pan. Arrange apple slices on batter; sprinkle with half of streusel topping. Spread with remaining batter; sprinkle with remaining topping.

3.Bake about 25 minutes or until toothpick inserted in center comes out clean.

Sunday, October 3, 2010

Day Trip to Oak Glen

There is a lot to do here in Southern California for a day trip but a lot of it is the same thing or it's super crowded, or expensive. For example, you can go shopping in Palm Springs, you can go to an amusement park, you can go up the tram, there's Big Bear. Honestly, I'm tired of shopping, it's exhausting. The very thought of navigating the family through a crowded and over priced theme park makes me cringe, and I feel the same about the tram. It's over priced and over crowded. And Big Bear seems too far away, plus there's not much to do there n the fall but shop.

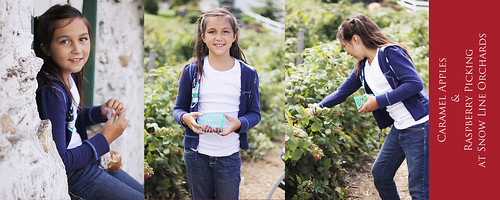
Yesterday we decided to switch it up a bit and head to the Oak Glen Growers Association which is a little township inside of Yucaipa, Ca. It was a blast, a totally laid back environment. While the crowds did start pouring in at around lunch time it never felt too crowded. We started our journey at Snow Line Orchards, where we ate fantastic cider doughnuts, sampled some unusual apple varieties like pink pearl, and picked a boat load of raspberries.
story

We then headed down to the town center for lunch at a BBQ joint called the rib cage. It wasn't bad but since I am a Texan and accustomed to certain BBQ standards I really can't say it was good either. Afterwards we walked around the village and found a cute little farm stand with heirloom apples and cider samples.

story2


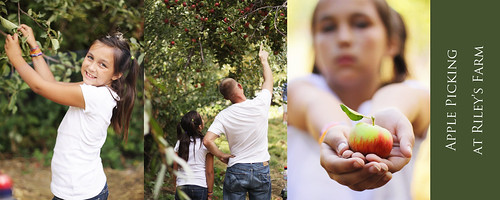
The last stop of our journey was Riley's Farm, a colonial farmstead where the employees are dressed in colonial era clothing. This is without a doubt a cool place to go, they've got a pumpkin patch, a petting zoo, great smelling food, and lot's more. We decided to go apple picking here and it was fun, you take a hay ride from the main colonial village up to the orchard and the take a trail past huge wild blackberry bushesand a beautiful mountain stream and fnd your self in a field of apple trees nestled in the mountains. From there you fill your bags with as many apples as you can. My only complaint is that one bag was $19, plus we paid $1 per person to walk the trail. It was kind of steep if you ask me but at the same time we had a great time, much more fun than we have had when we've paid more. If you don't want to spend that kind of money on apples you don't have to! You can still enjoy Riley's and then head down the road to a different apple orchard (there are plenty). Just call around and find the best price before going. http://www.oakglen.net/index.shtml

story3

Friday, October 1, 2010

Alice is a Walker

Last night my little 8 1/2 month old baby girl walked for the first time. She had taken a couple steps before then but last night she was able to walk across the room to get to something. After numerous tries to get it on camera we finally got a few steps so here they are: